Part of today’s hurricane prep involves setting up Fort Kickass, where we’ll hole up if things get really bad. In the case of our house, it’s the closet under the stairs, an L-shaped, surprisingly roomy, carpeted affair.
In case you didn’t know where the name comes from, it’s an Archer reference:
And since this post is about taking shelter in a closet, you’ve probably already guessed what the music video for this post is:
Here’s a selfie from our yard taken yesterday morning:
Yesterday morning.
Here’s another from the same place, taken this morning:
Here’s a wider shot of the yard, also taken this morning:
Click the photo to see it at full size.
And finally, here’s the Lowe’s that’s walking distance from our place at around 9:00 this morning. They closed soon after:
Click the photo to see it at full size.
Our status so far: We have plenty of provisions, and we’ve done the last of the work involved with the outside of the house. For the rest of today and tomorrow, it’s all about securing the house from the inside, which includes preparing our Harry Potter-style shelter in the safest room: the closet under the stairs.
As is the tradition with posts in this series, a thematically-appropriate music video:
Charity Shine on Me is an earnest, folksy prayer written by Chris Eschete while stuck in a hotel in Shreveport:
And finally, Juan Pastel is playing it up for laughs with Ay Irma (La cancion del Huracan Irma), which he introduces as his only — and possibly last — song. Even with my (very) basic Spanish, I found it amusing.
Plastic sheeting and duct tape to shelter-in-place.
Moist towelettes, garbage bags, and plastic ties for personal sanitation.
Wrench or pliers to turn off utilities.
Manual can opener for canned goods.
Local maps.
It also recommends these additional items, which you may or may not need, depending on your situation:
Prescription medications and glasses.
Infant formula and diapers.
Pet food and extra water for your pet.
Important family documents such as copies of insurance policies, identification and bank account records in a waterproof, portable container.
Cash. (The guide also recommends traveler’s checks, but have you ever tried using one recently? Nobody knows what to do with them anymore.)
Sleeping bag or a blanket for each person.
Complete change of clothing including a long sleeved shirt, long pants, and sturdy shoes. This is no time to do the Florida “shorts and flip-flops” thing.
Fire extinguisher.
Matches in a waterproof container.
Personal hygiene items.
Mess kits, paper cups, plates, plastic utensils, and paper towels.
Paper and pencil.
Books, games, puzzles, and other activities. (The guide recommends these for children, but why should they have all the fun?)
Since this post is about lists, and since I want to include a song on every Hurricane Irma Report, here’s Hall and Oates:
Here’s the NOAA’s estimation of the “earliest reasonable arrival time” of tropical-storm-force winds created by Hurricane Irma.
Click the graphic to see it at full size.
With Hurricane Irma expected to hit Florida on Saturday morning at the earliest, you may be wondering if you should stay put or evacuate. Or, as The Clash put it:
In the end, it mostly (but not entirely) comes down to a single question: Are you near the water?
I’ll leave it to Tampa Bay’s most senior TV meteorologist, Paul Dellegatto from local channel FOX 13, to explain:
I am getting a lot of questions asking about when we should evacuate.
You do not evacuate from the wind unless you live in a mobile home or you are facing a CAT 5 making landfall and you are expecting Andrew conditions right at the point of landfall.
Water is the killer. Wind is not. You run from water. You hide from wind.
We cannot evacuate the state based on the fact there may be strong winds. Given the options you would be better off riding out a storm in a well built home, out of an evacuation zone, then trying to drive up I-75 to a motel in Valdosta. You do not want to become part of the caravan driving up I-75. Trust me. It is a miserable option.
Hurricane Irma as seen from space.
Click the photo to see it at full size.
Anitra and I are always stocked for a hurricane, right down to the camping stove in case the electricity and gas go out. I’ve topped off our supplies, and picked up some extra sandbags. The one thing we don’t have is a generator, and hey, we may get one someday.
As of this morning, you’d never know that a major hurricane was coming if you didn’t have the benefit of radar. Here’s what the weather was like, as seen from our yard:
The view from our yard, around 10:00 a.m., Thursday, September 7, 2017.
For the benefit of friends and family who are wondering how we’re doing, as well as for the curious and those looking for information, I’ll post regularly here. Watch this space!
“I bought this ages ago,” she said, “and it was still in the packaging. The battery compartment’s all screwed up!”
“Screwed up how?” I asked.
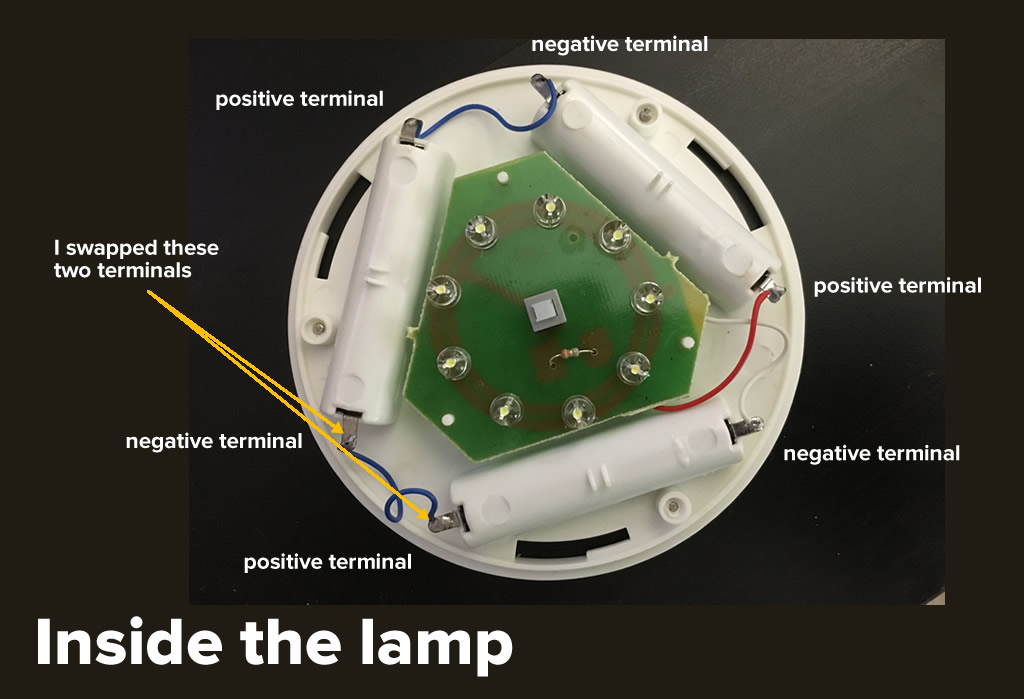
She opened up the back of the flashlight to show me what she meant. This is what I saw:
Click the photo to see it at full size.
In the photo above, the leftmost battery receptacle is set up properly. It has a negative terminal (the one with a spring) and a positive terminal.
The other two terminals are a carnival of half-assery:
One of them has two positive terminals, and
the other has two negative terminals.
“Wow,” I said. “That is screwed up. I should submit this to the You Had One Job Twitter account.”
From an electric circuit point of view, this isn’t really a problem. As long as the terminals can make contact with the battery, current will flow, and the bulbs will light up.
The problem is more about fit:
The battery fit in the receptacle with the two positive terminals is too loose, and the battery won’t make contact with the terminals.
The battery won’t fit into the receptacle with the two negative terminals — two springs takes up too much space.
“I can’t even return it!” Anitra said. “I don’t have the invoice anymore.”
“Maybe we won’t have to,” I said, and I took the flashlight to my desk in the home office. I wasn’t going to be beaten by a simple manufacturing defect.
I removed the three screws holding the flashlight together and saw that the fix was easy. It would be a simple matter of swapping two terminals, which would result in each receptacle having one positive and one negative terminal. The terminals slide out of the receptacle easily once you bend the metal tab holding them in place:
Click the photo to see it at full size.
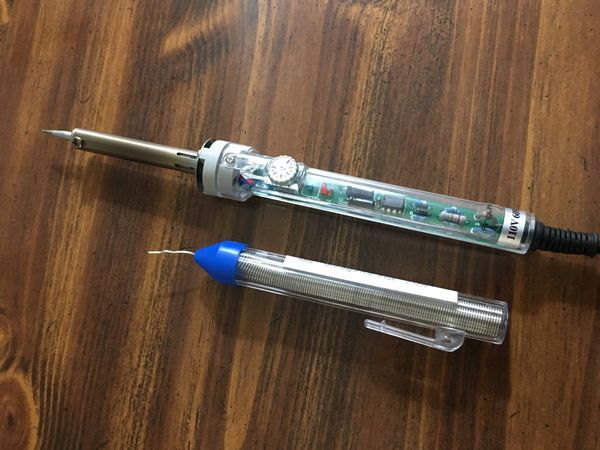
However, in the process of swapping the terminals, you need to disconnect at least one of them from the wire. Once you swap them, you have to reestablish the connection. It was time to break out the Christmas present that my in-laws gave me:
Late last year, they’d asked me what I wanted for Christmas. I suggested that I could use a soldering iron, and they delivered. Then things got crazy, what with suddenly having to search for a job and all the madness that ensued, so this ended up being my first chance to break it out.
I plugged in the iron, let it heat up, and moments later, I unsoldered one of the terminals. I then swapped the terminals, and then reconnected the loose terminal with a proper joint:
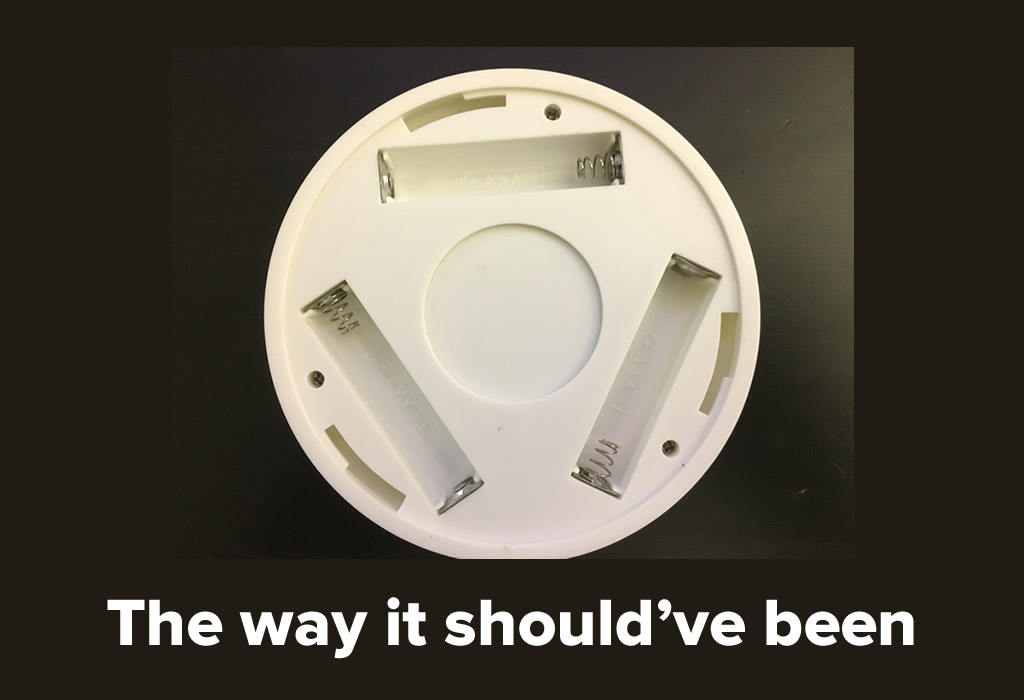
With the repair complete, I screwed the unit back together, and the battery receptacles now looked like this:
Click the photo to see it at full size.
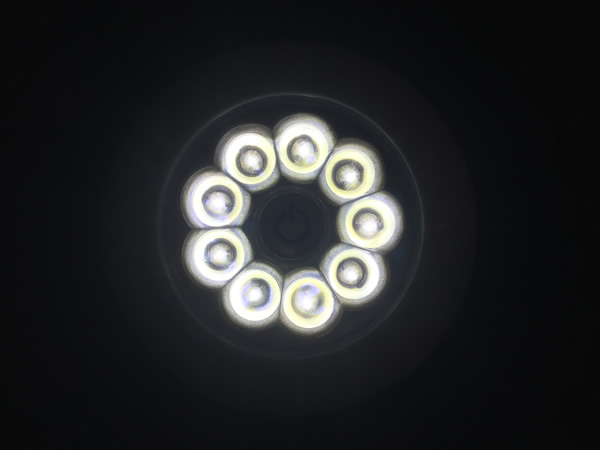
I inserted three fresh AAA batteries into the flashlight, closed the battery compartment, flipped it over, and pressed the power button. Here’s what happened:
Success!
I brought the flashlight to Anitra, who was impressed with my work. Red Green was right:
I am mindful of the fact that I’m fixing only one flashlight at my leisure, in the comfort of the ergonomic chair in my air-conditioned home office, and not hundreds or thousands every day on a barely-maintained assembly line in a non-air-conditioned factory in the Third World for a laughably tiny wage.
The repair I made would be considered laughably simple by an electrician or electronics tech, and I’m willing to bet it would’ve been within the abilities of most of the regulars at Tampa Hackerspace. They might even be amused that I found this incident worthy of writing a whole blog article, complete with photos.
But it is worthy of a blog article. I’m willing to bet that this repair would’ve been beyond most people, who — without a way to return or exchange the flashlight — would’ve simply tossed it in the trash or recycled it. That’s a pity, because in spite of the increasing complexity of our devices, a good number of them are still repairable with a modicum of skill, and as the do-it-yourselfers say, “If you can’t fix it, you don’t really own it.”
Click the poster to see it at full size.
I’m not going to claim that I can do every kind of repair, but I’m glad that I’ve been able to do a number of them around the house, from this flashlight to the sensor in our washing machine to patching the chip in our granite kitchen counter to replacing the faucet in our kitchen sink.
It may actually be easier to perform a lot of household repairs yourself these days, thanks to the proliferation of YouTube repair videos. I wish I’d thought of recording one while repairing the flashlight. If you find yourself needing to fix something, search YouTube — the odds are goods that there’s a “how to fix it” video.
Another good source of “repair recipes” is iFixit, which is home to tens of thousands of electric and electronic repair guides, and they’re the people behind the Repair Manifesto featured above. I don’t know if they’ll ever come close to their stretch goal — a repair manual for every device in the world — but I applaud them for it.
And finally, if there’s a hackerspace or makerspace in your area — here in Tampa Bay, we’ve got places like Tampa Hackerspace, The Hive, and others — check it out, join it, support it, learn, and take control of the things you own.
There’s a price to be paid for fixing things yourself: time. What you save in money and from the landfill, you pay in the time invested in the repair, and if need be, learning how to do it.
But there’s a payoff — being able to fix things helps build a “can do” mindset. That’s something that you’ll bring with you wherever you go, and it’ll take you far in work, life, and play.